Monday, May 28, 2012

Nuts About Sketches #215- Learning is Fun!

Happy Memorial Day everyone! I hope you are having a fun and safe weekend!

Today is the reveal of the newest sketch at Nuts About Sketches.  It is another fabulous two pager!  For this one, I tried to make photos I already had printed out work, so I made quite a few adjustments.

Instead of the two photos on the left side, I used one and made a paper block to take up the larger space.  I also used several 3x4s across the bottom instead of the square photos.  I kept the paper strips, the title and journaling placement.

For the detail above the 4x6 photo and title area, I cut circles in various sizes from patterned paper and layered them.  I took a few epoxy stickers and layered those on top for some dimension.

For the detail across the bottom, I used a border punch, punched some scratch paper and traced that as the trail behind my snail.  Speaking of the snail, that, along with the pink felt were the last of the package!  Woo hoo!  I love when I use up supplies!!

That's all from me for today, enjoy the rest of the weekend!

Tuesday, May 22, 2012

Teacher Gifts: Monogrammed Cards

I've spent the last couple of days working on gifts for my daughter's preschool teachers. I decided to make monogrammed cards for each of them in their favorite colors. I also had some fun playing with ink on these. :)

For the first set, I used my brayer and some purple spray ink to color the card base. I got the idea from this May Flaum video. I then stamped over it with a background stamp. The frame and letter were cut using the "Storybook" Cricut cartridge. I used this week's Unscripted Sketch. They are having a "piggyback challenge" this week which was to get inky, and I certainly did on this one!

For the next set, I used the current Mojo Monday sketch. I pulled out my alcohol inks and glossy cardstock on this one. I started by stamping red ink and gold mixative all over the piece of paper. Then I went back over it with blending solution making a twisting motion with the tool, creating a swirl pattern. Again, the letter and frame were cut using "Storybook".

Monday, May 21, 2012

Nuts About Sketches #214- I Pray For You

This week we had another fun sketch to work with for Nuts About Sketches. Since the sketch called for one large photo, I decided to take the opportunity to make an "I Pray For You" layout for my son. (You may remember this was an assignment from the "Scrapbooking Your Faith" class I took.)

For the large circle, I cut the center out of a die cut piece of paper (the outside was purple). I distressed the edges of everything because that weathered wood paper begs to be distressed. I sprayed the background using a couple colors of blue mist and the cardboard leftover after punching out game pieces.  The "On The Bright Side" paper pack comes with banner pieces, I used three of those to match my layout and used them as a pattern the cut the rest from patterned paper.

I liked the lined paper that I used for the journaling spot, but it was white.  So I took some red and yellow Distress ink and inked the paper until I was happy with the color.  Then I splattered some water on it to make the spots.  I LOVE how it turned out, there is so much you can do with Distress Inks!
Materials:
Cardstock- Bazzill
Patterned Paper- Bo Bunny Press and My Mind's Eye
Die Cuts- My Mind's Eye and  Creative Memories
Buttons- Bo Bunny Press, Jesse James Co., Fancy Pants Designs
Brads- Basic Grey and Oriental Trading Company
Die Cutter- Cricut
Cartridge- Cricut Classic Font
Rub ons- Making Memories and Scrap Works
Spray Ink- Tattered Angels
Ink- Tsukeniko, Ranger
Pen- Creative Memories

Sunday, May 20, 2012

It's a Girl!

My sister-in-law is pregnant and getting to the not-so-patient stage (today is her due date).  And I guess I am there too, because here is my card for my new little niece, ready to go when she decides to make her appearance.

I used this week's sketch from Mojo Monday. I started by going into my pack of pre-cut felt shapes and pulled out the heart.Then I found paper and ribbon that went together.  The cute little monkey and the sentiment are from the "New Arrival" Cricut cartridge.

Thursday, May 17, 2012

Minnesota's Largest Candy Store

I did this layout for several challenges. The first was challenge #6 at My Scraps and More as part of their "Mother May I Crop" which was to use black, white and yellow. The second is this week's Fabulous Friday Challenge at Frosted Designs which was to do lacing on a project. The last was this month's challenge at Scrap Your Crap: use chipboard.

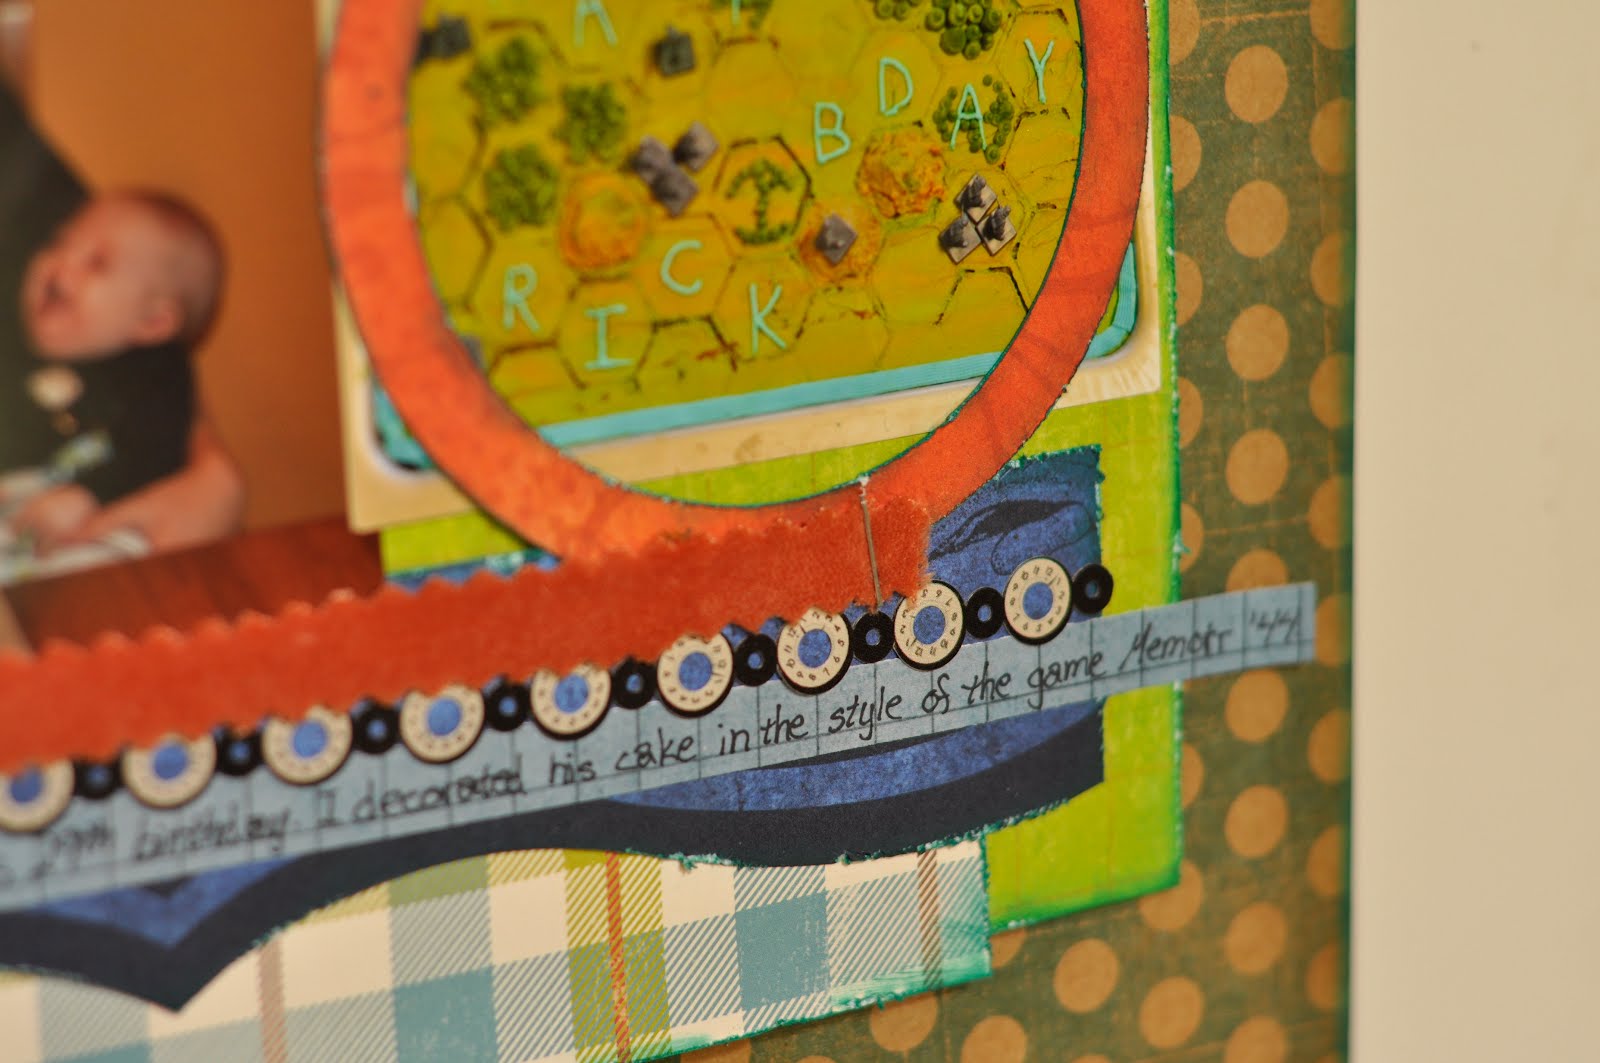
I don't usually do color challenges because I don't like to be limited in my color choices, but this one worked out well. I think I needed to be limited because the photos are pretty busy and colorful. Having a set color scheme definitely limited my embellishment options, which is where the chipboard came in handy. I sprayed and painted a circle and then put it in a bag to make it look like a giant candy. I also took a chipboard arrow and painted, inked and stamped it to work with my layout.

For the lacing challenge, I had punched all the holes across the black paper and was about to do the lacing when I had a light bulb moment and decided to set an eyelet in each hole! I used up 46 eyelets on this layout- woo hoo!

For my title I used my Cricut and Sure Cuts A Lot and played with some different fonts.  I did the shadow blackout feature on everything and cut it out together for the background and then cut the words or in the "normal" mode in different colors for the top layer.  The word "Largest" I attached with foam adhesive to give it a little dimension.

Materials:
Cardstock- American Crafts
Patterned Paper- 7gypsies and Cosmo Cricket
Chipboard- Oriental Trading Company
Eyelets- Making Memories
Gromlet- We R Memory Keepers
Twine- Pink Paislee
Fonts- Fairfax Station, Massive Headache, AC
Die Cuts- K and Company
 Die Cutter- Cricut
Software- Sure Cuts A Lot
Epoxy accents- EK Success, Pink Paislee
Spray Ink- EK Success
Paint- Liquitex
Ink- Clearsnap, Ranger
Pen- Zig
Chalk- Oriental Trading Company

Monday, May 14, 2012

Nuts About Sketches #213

A new sketch was revealed this morning at Nuts About Sketches- a two-pager!! It was another fun sketch to work with. I used photos of my middle child at the park two summers ago.


This layout also works for a couple of challenges. The first is part of the "Mother May I" Crop at My Scraps and More. Challenge #1 (there are 18 of them!) was to used something on your layout that started with each of the letters of mother. I used:
M-masking tape (the decorative kind, I bought it in the office supply section of Target)
O- "Out and About" title T- Thickers (the ampersand) H- Heartbreaker font E- eleven photos R- Ranger ink The bonus challenge was to use something on your layout that you would find on a birthday present, I used tape.

The other challenge comes from the "thinking*through*design" blog, which was to use an analogous color scheme. I didn't set out with that purpose in mind on this layout, but I worked from the large polka dot paper and so I used blues and purples throughout the page. I also tried adding some trendy confetti to my layout, which happens to be the holes punched when I did the border strips for this page. I just put a few dots of glue down, sprinkled the dots over it and shook off the excess.

Sunday, May 13, 2012

Scavenger Hunt Sunday 5-13-12

Happy Mother's Day all!  This week I managed to take some photos for the scavenger hunt.  I am loving the warmer weather and getting to use outdoor, natural light!!

Sidewalk
My little guy walking home from the park, with the duckies from his stroller and sippy cup in hand.  :)


Inspiring
I was inspired by a few blog posts this week to try some new activities with the kids.  This post talked about making homemade chalk paint.  I jumped at the chance to use up all the small chunks of sidewalk chalk my kids had.  We put all the pieces of the same color in a Ziploc bag, smashed them into powder with hammers, dumped them into a jar and added water.  The kids have LOVED it! 


Time
As in freezing time.  Doesn't she look like she is having the best time?


Close Up
We planted flowers in my flowerbeds on Friday.  Here is one of the plants Ellie picked out.


With Mirror
When I saw this prompt I thought about some cool effects I could do, but then this little opportunity presented itself and I couldn't pass up sharing the photo (there is a little mirror showing in the top left).

Saturday, May 12, 2012

Happy Mother's Day!

I've been busy making cards for the mothers in my life and I am here to share them today, a day early.

For the first card, I used the current card sketch at Frosted Designs. I am also linking up with the current stamp and die cut challenge at Cooking With Cricut, which is to make a Mother's Day card using a stamp or manual die. Since "all" I have for die cutting is a Cricut, I used a stamp. This stamp is from an older Stampin Up set. I stamped it in Archival ink and then colored it with watercolor pencils. I went over the coloring with a water pen to blend the colors.

I used an embossing folder to make the frame on this one and then inked the raised part with a few different colors of ink to make it stand out.

I used my Cricut a lot for this one. The background and sentiment were cut using the "Cindy Loo" cartridge, and the butterfly is from the Sentimentals cartridge. I wanted to add a little something to the tone on tone background so I went over some of the flowers with Moonlight Smooch ink.
There you have it, I have cards for my mom, mother-in-law and two grandmas (I made two of the first design). I hope all the mothers out there have a great day tomorrow!

Tuesday, May 8, 2012

April Layout Tag

I participated in a round of layout tag at Club CK. This time I was first in line and got to work from this fabulous sketch:

As you can see, I rotated the sketch to accommodate my horizontal photos.  I used transparency for the circles so they are pretty subtle.  To add some texture and layers to the flower elements, I stamped some flowers and then added paper flowers on top .  The title was cut using the "Makin' the Grade" cartridge.  The transformation of the sketch was pretty cool, you can check it out here.
Supplies
Cardstock- Bazzill
Patterned Paper- Bo Bunny Press, Robin's Nest, Provo Craft
Transparency- Anna Griffin
Dew Drops- Robin's Nest
Flowers- Prima, Kaiser Craft
Die Cutter- Cricut
Cartridge- Makin the Grade
Stamps- Stampin Up
Ink- Clearsnap, Ranger
Brad- Basic Grey
Journal Spot- Jillibean Soup
Pen- Tsukeniko, Sakura
Pencils- Koh-I-Noor
Punch- Ronic- Martha Stewart
Circle Cutter- Creative Memories
Sticker- Little Yellow Bicycle 

Monday, May 7, 2012

Happy Birthday- Resist Embossing

I managed to squeeze in one more challenge from Frosted Designs! Today I tried Anita's challenge which was to use resist embossing. I have done this before, but I figured it was time to try it again. My nephew (and godson's) birthday is on Wednesday so I decided to make a card for him.

I initially was thinking of going with a jungle theme and stamping some leaves on my card for the technique. I realized I don't have any "jungle" leaf stamps so I decided to go with a forest animal instead. I found this cute snail on the "Boys Will be Boys" Cricut cartridge and decided to go with that. For the background, I stamped the leaves with VersaMark, heat embossed them with clear embossing powder, and then sprayed the paper with three different colors of mists. The colors didn't end up as vibrant as I had hoped on the green cardstock, but it gave some texture all the same. The "splat" that the sentiment is stamped on is the flower bush from "Live Simply". I took some Stardust Stickles and smeared them behind the snail to make it left like it left a slimy trail.

Nuts About Sketches #212

A new sketch was revealed this morning at Nuts About Sketches. I used it to scrap some pictures of Rick from his birthday a year and a half ago. I also made it into a pocket page to hold his cards. I stuck pretty close to the sketch. I used lots of "masculine" patterns and distressed and inked the edges of all the layers to add some texture.


I covered a chipboard tag with patterned paper, splattered some spray ink on it and then layered some die cut stars over it.

I also did this layout with the first May issue challenge at Club CK in mind: create a project using staples. I stapled the ribbon and made an "x" with staples on the red star in the top left corner.

Finally, Shawn posted some bonus sketches at Nuts About Sketches last week, and they are awesome! You can check them out here.

Supplies:
Patterned Paper- My Mind's Eye, Bo Bunny, October Afternoon
Stickers- Bo Bunny
Chipboard- Oriental Trading Company
Button, star- Bo Bunny
Ribbon- Robin's Nest, Making Memories
Ink- Clearsnap
Pen- Sharpie, Marvy
Spray Ink- Creative Imaginations
Die Cutter- Cricut
Cartridges- Makin the Grade, Cricut Classic Font
Punch- Marvy

Sunday, May 6, 2012

Teacher Appreciation- Cooking With Cricut

This week's challenge at Cooking with Cricut was to make something with your Cricut in appreciation of a teacher. This challenge reminded me that I should put together some gifts for Ellie's preschool teachers and the girls' dance teacher. Madison (who is on the CWC design team) made this adorable card set for one of her teachers and that inspired me to make some cards for the aforementioned teachers. I started with the girls' dance teacher and made some monogrammed cards for her.


I used the Storybook cartridge for all of the cuts on these cards. I think I will be going with a similar concept for the other two teachers.

Welcome to the Bird Show

I did get a layout started yesterday and just finished it!  I chose to do one of the NSD challenges over at Frosted Designs.  Ashley posted a recipe challenge yesterday: use 4 of the following: handmade embellishment, yellow, stripes or polka dots, at least 3 buttons, twine, and a punch.  Well, I managed to use all 6!

Shawn at Nuts About Sketches posted 4 bonus sketches this week and I decided to use this one.
 

I didn't actually use any hexagons as the sketch suggested, but I used those areas for embellishments.  For the bird and nest and "Welcome" I used my Cricut and the "Zooballoo" cartridge.  The papers were all from the My Mind's Eye "On the Bright Side" collection.  For the background, I took the yellow chevron paper and ripped it along one of the white lines.  On the left side of the cardstock, I used some Distress Stain and stamped with some bubble wrap. 


Supplies
Cardstock- Bazzill
Patterned Paper and Tag- My Mind's Eye
Buttons- Fancy Pants Designs and Jesse James and Co.
Punch- Marvy
Die Cutter- Cricut
Cartridge- Zooballoo
Software- Sure Cuts A Lot
Font- Joint by Pizza Dude
Pens- Sakura, Tsukeniko, Creative Memories
Ink- Ranger- Clearsnap
Twine- Pink Paislee
 

Saturday, May 5, 2012

Baby card- Cardabilites #54

Happy National Scrapbooking Day! I have yet to do any crafting today, but I hope to get a little done when I get done writing this post. I hope you are having a great day!

 Today I am sharing a card I made earlier this week for a friend who had a baby a week ago.  I used the current sketch at Cardabilities.
I stuck close to the sketch.  I even dry embossed my background with an argyle pattern to match the diamond grid on the sketch.  I cut the sentiment square using my Cricut and the New Arrival cartridge (Card 3 function).