Thursday, September 29, 2011

Back Porch Memories, Sketch Saturday and Layout Tag

I have a few things to share today that I have done recently.

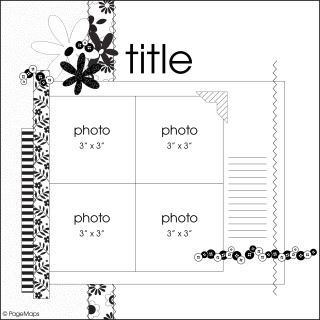
The first is a calendar page for October. I used this Becky Fleck sketch for the Back Porch Memories November Guest Designer contest. The sketch is for a square layout, but I made adjustments for my 8 1/2 x 11 calendar page. I used one of my new Glimmer Mist colors on this one (Raven- black ink with purple shimmer) on the orange block of paper and for the chipboard photo corner under the sticker. I didn't really like the graphic that was in the corner of the journaling block I used so I stamped and heat embossed the pumpkin to cover it up. I attached it to my layout with some foam adhesive the add a little dimension.


Next, I made this card for my nephew who turns 11 tomorrow. Masculine cards are a challenge and 11 year-old boys an even bigger challenge, but I decided to go with a football theme since that is what he plays. I found this week's Sketch Saturday sketch and thought I could easily change it to make it more masculine.

This card came together so easily, but there were a couple of changes from what I thought I was going to do along the way. The paper I used for the football is actually from the Halloween collection I used on the above layout. I saw a scrap of it and thought it would make a great football. I cut it out using my "Boys Will Be Boys" cartridge and my Cricut. For the center panel, I was going to use some grass patterned paper I used to have, but alas, it was gone. :( So I decided I would use this green cardstock and dry emboss the panel. I was going to use a different embossing folder, but when I opened my box of folders, my notebook paper one was on top and and I went, "This kind of looks like the lines on a football field!" so I used that one instead. I edged all of my papers with brown ink and then rubbed a white inkpad over the center panel to further highlight the football field feel of the embossing.


Finally, I participated in a layout tag (or Chinese Whispers as they call it) on the Creating Keepsakes forum. If you are unfamiliar with this, the person running the "tag" selects a sketch or layout as inspiration and sends it to the first person. They make a layout based on that and then send their layout to the next person and so on until everyone has had a turn. It is so fun to see how the original idea changes with each person! I also find it fun to see how another person finds inspiration in my work! You can see the full tag here. Here is my layout.

Tuesday, September 27, 2011

Conterfeit Kit Challenge Blog Hop

Hi and welcome to the Counterfeit Kit Challenge Stamping Techniques Blog Hop. If you arrived here from Milissa's blog, you are in the right place. If you did not, but would like to check out the blog hop, you can head over to the Counterfeit Kit Challenge blog and start there!

Today I am sharing one of the 3 fabulous techniques that I learned at Scrapfest in the Hero Arts- Thinking Inking class taught by Jennifer McGuire and Shari Carroll.

For this technique you will need:
Tim Holtz Distress Inks, one dark color, one lighter color (I used Forest Moss and Wild Honey)
Plain White Cardstock (smooth would work best)
Stamp
Glimmer Mist or other spray shimmer (In class we used 1 t. Perfect Pearls powder mixed with a spritz bottle full of water)


Step 1
Take darker ink pad and ink paper so that it is completely covered.


Step 2
Ink your stamp with the lighter ink color.


Step 3

Spray inked stamp with Glimmer Mist 3-4 times from 12-18 inches away until lightly moistened. You don't want to get it too wet because the image will not stamp as crisply then.

Here's how it should look after you have sprayed it:


Step 4
Stamp on inked cardstock. Repeat steps 2-4 if you are making a background with a smaller stamp as I did here. You can do this technique with a background stamp (which is what we used in class) and only stamp once.


Step 5

Allow to dry. The stamped image won't be clear at first, but as the inks and mist work together the stamped image will start to stand out. (This technique has to be done using Distress Inks because they are water soluble so they react to water.)


Step 6
Once your paper is dry, embellish as you wish!

For this one, I stamped with Barn Door as well to add another color. I then took a gold paint dabber and edged the paper. I finished it off with a die cut sentiment, ribbon and photo corners.


For this card, I matted the stamped piece, used some scrap strips to embellish, added a die cut sentiment, and attached some brads to finish it off.


There you have it! I really enjoyed learning this technique, and I hope you did too. I have two more techniques that I learned in the class that I will be sharing the next two Mondays, so stop back then! Now you can head to Rebecca's blog and check out her stamping technique.

Thursday, September 22, 2011

Cheers to 75 Years

I just finished this two page layout yesterday. It works for 3 different challenges too: Back Porch Memories "Use Your Stamps" Journal It challenge, Club CK Issue Challenge #4- use numbers in your title, and Sweet Peach Crop Shop Crop Challenge #2- use numbers on your layout.

I also tried some new (to me) ideas on this layout. I used a layout in the February issue of Creating Keepsakes as inspiration for my layout. That layout used two different patterned papers as the bases for the two pages. While I didn't intend on doing that with this layout, I ended up doing it out of necessity because I couldn't find two sheets of the same patterned paper that worked for this layout. I then used the same color of cardstock across both pages to create continuity between the pages. The other thing that I tried was using a paintbrush with my Glimmer Mist. I'm not sure why I never thought of this on my own, but when I heard the idea on this episode of Paperclipping Roundtable, I was inspired! I used it around the edges of the scalloped circle in my title and the scalloped frame around my journaling. I misted the pieces, but felt like I wanted something a little more drastic around the edges to make them stand out.


Here is another layout I made about a month ago that I never posted. I like to do 6 month recaps for the first 18 months to 2 years of my kids' lives with their major milestones. I always struggle with the design of these and tend to put them off, but I finally got Addy's done (she'll be 3 in a month).

Tuesday, September 20, 2011

Scrapfest 2011

This past weekend I had the opportunity to spend 2 fabulous days at Archiver's Scrapfest, held at the Mall of America. This is the fifth year that I have attended, and it was a lot of fun once again. On Friday I took 4 classes: Pink Paislee- Home for the Summer Layout and Cards, Creative Imaginations- Life Mini Album, Making Memories- Slice Dilly Dally Pages, and Hero Arts- Thinking Inking Cards. I enjoyed each class in its own way and it is always fun to play with new products!

For the Pink Paislee class we got to use some of their Hometown Summer line. We spent the entire class time working on assembling a two page layout. We went home with lots of extras and the directions to make the two cards, which I did that night. (I have not yet completed the layout because I don't have photos for it, but once I do, I will post a picture of the completed layout.) While I didn't learn anything new, I enjoyed this class, the products are fun, the atmosphere was great (especially with Heidi Swapp there playing background music during the instructional lulls!), and we got lots of product to take home!


Next was the Creative Imaginations mini album class. The description of this class talked about working with their Twinkling H20 paints, however, we spent a total of 2 minutes painting 2 colors onto two sheets of resist paper. While the effect was cool, I had hoped for more opportunity to work with this cool product and learn some new techniques. We spent the rest of the class attaching the papers (from their Sakura collection) to the chipboard pages of the album. I will post photos of this album once I finish it (which may be a while, I still have to finish my mini album from last year!).

After a lunch break with my wonderful husband (who works just a few miles away), I headed to the Making Memories class. The description of this class said that we would be working with die cuts made with their Slice machine. I don't own a Slice, but I figured any techniques that they taught could probably be used with Cricut die cuts as well. All of the pieces were precut for us, so all we had to do was assemble the page. This makes for quick assembly (and the only class that we completed the project in the time allotted), but it didn't really teach me much in terms of new techniques. We were just given the pieces and told we could add our own flair to them. The pages turned out cute, and I will photograph them and repost them when I have added photos.


Finally, I headed to the Hero Arts class taught by Jennifer McGuire and Shari Carroll. Oh my goodness! If you are into stamping and ever have the opportunity to take a class from Jennifer McGuire, TAKE IT! I have taken a class or two from her before and every time I am so inspired and come away with great new ideas and this was no exception! We worked with 3 different techniques to make three beautiful cards. I will be doing tutorials for these in upcoming posts because they are just too cool not to share!! We just had time to work with the techniques and most of the card assembly I did when I got home that night.


After I finished my classes, I got into line to do some make and takes. I ended getting into some pretty long (or maybe just slow moving) lines and only got 2 done before they started cutting off the lines for the day. On Saturday I went back with a friend and we stood in some more lines. I ended up completing 15 make and takes. The quality of the make and takes was definitely better than years' past and several of the manufacturers had people going back in the lines helping scrappers get started on a part of the project so that once they made it up to the table, they would spend less time there and (hopefully) keep the line moving. Here are the make and takes I completed (starting from the top left going from left to right): Making Memories, McGill, Authentique, Hampton Art, Echo Park, Sizzix, We R Memory Keepers, American Crafts, Basic Grey/3L/Hero Arts, Fancy Pants, Designs, May Road, Epiphany Crafts, Doodlebug Design, 7gypsies, and Core'dinations.


So, there you have it, it was a fun weekend and I am already looking forward to next year!

Thursday, September 15, 2011

Happy Birthday to Rick!

Yesterday was Rick's (30th) Birthday!!! We already did most of our celebrating, but he did get his presents and cards yesterday. I used this week's sketch from Card Patterns for mine:


I bought 5 new colors of Glimmer Mist last week because the local store I go to, Scrapbooks Too, had them buy 2 get 3 free! I decided to use one of my new colors for this layout: Sugar Maple. It is a gorgeous coppery color. I used a mask and sprayed it on the red background cardstock and I also used it to color the key. After the mist dried I went over the key with a gold paint dauber and some dark brown paint.

I am off to Scrapfest for the next 2 days! I am so excited to learn some new stuff, play with new products and just take in all the scrapbooking energy!

Sunday, September 11, 2011

Published!!

I just found out I will have a layout in the September Scrapbook News and Review e-zine!! It debuts next Sunday!!

Surprise!!! Party

I haven't had a lot of time to scrapbook in the last couple of weeks because I have been working on another very important project: a surprise birthday party for my husband! It has been one of the most stressful things I have ever done! It is really hard to hide something like that from your spouse! Yesterday was the party and it went great!

My husband is really into board games and one of his favorite games is Carcassone. I decided I wanted to make his cake based on that game this year. I ended up searching the internet for ways to make the "meeples" out of candy. I ended up finding a couple of tutorials using different products. The first was using a product called Plastique, which ended up being a little more expensive than I wanted. So I went in search of another option and found this video using a product called Amazing Mold Putty that was much more reasonably priced.

Here is the result:


And a shot of the birthday boy's face when looked into our living room and say the faces of about 40 friends and family!

Wednesday, September 7, 2011

Blue Ribbon Scrapping 2011

I decided to enter a layout into the Minnesota State Fair this year (at the strong urging of some friends). I decided to enter a layout in the 12" x 12" Special Occasion category. I ended up winning that category and the Sweepstakes category, which is the overall scrapbooking category! You can find the full results here. I got to pick up my entry and ribbons today, so here is a picture of it!

Sunday, September 4, 2011

Photo Scavenger Hunt

I found a really cool blog last week called Ramblings and Photos by Ashley Sisk. Each week Ashley gives 5 photo prompts for readers to take photos of. Since I am done with Project 365, I thought this would be a fun way to continue working on my photography skills, especially since many of the prompts are better interpreted using inanimate objects, the area I struggle most. It is also an opportunity to play a bit more with Photoshop Elements. Here are my photos for this week's prompts:

Stairs


Macro


Clouds


Abstract


Smile

Friday, September 2, 2011

Some Cards and Back Porch Memories Contest

I completed a few projects today and gave my Cricut a workout in the process! The first was this layout that I have been working on all week. It is for the October Guest Designer Contest at Back Porch Memories. My layout is based on this fabulous Becky Fleck sketch.

I used Echo Park papers and Heidi Grace embellishments for this one. To add some texture to the background I used a Crafter's Workshop mask and Slate Glimmer Mist. And no, your eyes do not deceive you, that is indeed a banner on there! I really liked how the last one turned out so I decided to stick with the one suggested in the sketch and use it for my title. I used my Cricut and Sure Cuts A Lot to cut the triangles, the "Sentimentals" cartridge for the bracket paper, and the "Cricut Classic Font" cartridge for the words "You're a".


I also completed two cards tonight. The first is a birthday card for my niece. She is turning 14 on Sunday (so she won't be receiving this in time). I used the current sketch at Card Patterns. I used my Cricut and the "Live Simply" cartridge to cut the flower.


Finally, I made this card using some scraps from the above layout. I also used the current Mojo Monday sketch. I used my Cricut quite a bit for this one. I used the "Boys Will Be Boys" cartridge for the shoe and circle and the "Makin' the Grade" cartridge for the "Happy Day" sentiment.